Why Your Browser Blocks Webhook Endpoints: CORS and Frontend Security
Why Your Browser Blocks Webhook Endpoints: CORS and Frontend Security It's a rite of passage for many junior and frontend developers: you're building an e-commerce store or a SaaS...
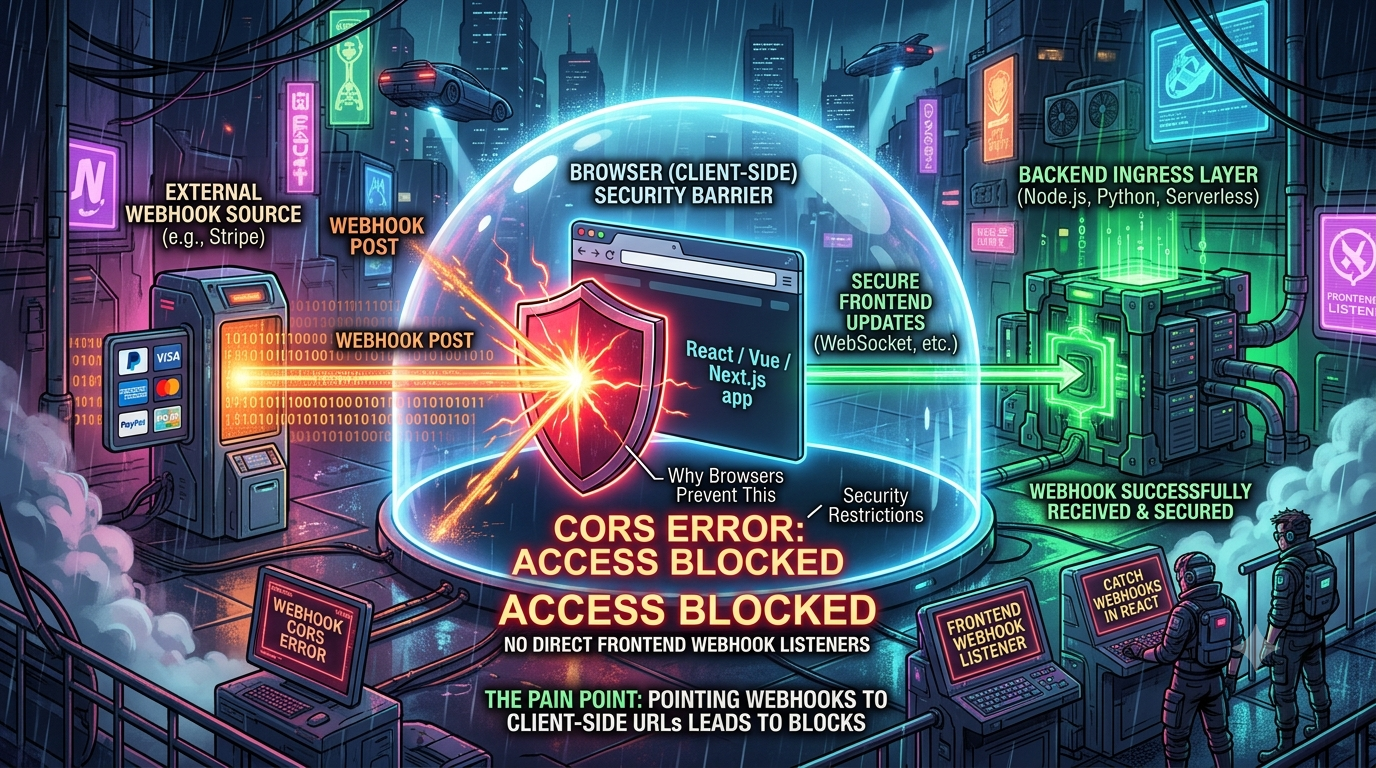
Why Your Browser Blocks Webhook Endpoints: CORS and Frontend Security
It's a rite of passage for many junior and frontend developers: you're building an e-commerce store or a SaaS app in React. You set up a Stripe checkout flow, open your webhook settings, and paste in your client-side React URL — something like https://my-app.com/checkout/success or http://localhost:3000/webhook — expecting your frontend to catch the event when a payment succeeds.
Instead, you hit a wall. Either your browser throws a CORS error, your dev server returns a 404 Not Found, or the third-party provider flags your endpoint as unreachable.
Here's the short version: you cannot directly catch webhooks in a client-side React app. Browsers are explicitly designed to block this architecture, for good security and networking reasons.
This guide breaks down why webhooks fail in client-side apps, how CORS and browser sandboxing actually work, the real security risks of trying to work around it, and the production architecture you need instead — updated with how providers like Stripe are evolving their webhook payloads in 2025–2026.
What Is a Webhook, and Why Is It Different From a Normal API Call?
POLLING (Client-Driven)

  +------------------+     1. GET /api/status     +---------------+
  |  Browser Client  | -------------------------> |  Third-Party  |
  |  (React App)     | <------------------------- |  Server       |
  +------------------+     2. "Still Pending"     +---------------+

WEBHOOK (Server-to-Server)

  +------------------+    HTTP POST /webhook      +---------------+
  |  Your Backend    | <------------------------- |  Third-Party  |
  |  Server          |    (Payment Succeeded)     |  Server       |
  +------------------+                            +---------------+
Traditional REST calls (pull model): your frontend initiates an outbound request asking for data — fetch('https://api.stripe.com/v1/charges') — and the server responds.
Webhooks (push model): an automated HTTP POST sent by a third-party server (Stripe, GitHub, Shopify, Clerk) to your system when something happens. The provider is the HTTP client; your infrastructure is the HTTP server.
That last part is the key. Webhooks require an active HTTP listener bound to a public IP or domain, ready to accept incoming POST requests around the clock. A React app compiled into static HTML/CSS/JS files running inside a browser tab isn't that — and was never designed to be.
The Anatomy of a Webhook CORS Error
There are really two separate failures hiding behind "it doesn't work."
1. The Single-Page App Misconception
When you build a React app with Vite, Create React App, or a statically exported Next.js site, your code compiles into static assets. The browser downloads them and runs the JavaScript locally, in the user's tab.
Your React app is not a web server. It doesn't open a socket listening for inbound HTTP calls, and it can't accept a POST request sent across the public internet. If Stripe or GitHub sends a POST to https://my-app.com/webhook, your static host (Vercel, Netlify, S3, Nginx) either serves index.html regardless of the method, or returns 405 Method Not Allowed, because static file servers are generally only wired up to answer GET.
2. Why CORS Triggers in the Browser
If a developer tries to work around this with a client-side call to a webhook-style endpoint, they run into a genuine CORS error.
Cross-Origin Resource Sharing (CORS) is a browser-enforced rule that governs whether JavaScript running on Origin A (https://my-app.com) is allowed to read the response from a request made to Origin B (https://api.stripe.com).
BROWSER CORS PREFLIGHT CHECK

 [ React App ]                                  [ Third-Party Server ]
 https://my-app.com                             https://provider.com
      |                                                   |
      | --- 1. OPTIONS /webhook (Preflight) -----------> |
      |      Origin: https://my-app.com                  |
      |      Access-Control-Request-Method: POST         |
      |                                                   |
      | <-- 2. Response missing CORS headers ------------ |
      |      (no Access-Control-Allow-Origin)             |
      |                                                   |
 [X] BROWSER BLOCKS THE REQUEST
     Console: "CORS header 'Access-Control-Allow-Origin' missing"
When a browser sees a cross-origin request with a non-simple method or content type (like POST with application/json), it sends a preflight OPTIONS request first. Webhook providers build their infrastructure for automated, server-to-server ingestion — not browser calls — so they don't return browser-friendly headers like Access-Control-Allow-Origin on these preflights. The browser sees that and blocks the whole request before your JavaScript ever touches the response.
This is browser behavior working exactly as intended. It isn't a bug in your code, and it isn't something a "CORS fix" library should paper over for this use case.
Three Real Security Risks of Frontend Webhook Processing
Even setting aside the technical impossibility of accepting inbound connections in a browser tab, trying to route around it introduces real vulnerabilities.
Risk 1 — Exposing signing secrets
Webhooks are authenticated with HMAC (Hash-based Message Authentication Code) signatures. When Stripe sends an event, it signs the payload with a secret unique to your account (whsec_...) and includes the resulting hash in a header (Stripe-Signature).
// NEVER do this in frontend code (React / Vue / Vite)
const webhookSecret = "whsec_live_9F8a7B6c5D4e3F2a1..."; // visible to anyone in DevTools

export function verifyWebhook(payload, signature) {
  // any user can inspect your JS bundle and steal this secret
}
Anything bundled into client-side JavaScript — including variables prefixed VITE_ or NEXT_PUBLIC_ — ships to every visitor's browser and is fully readable in DevTools. A leaked signing secret lets an attacker forge events (payment_intent.succeeded, for example) and grant themselves things they didn't pay for.
Risk 2 — Replay and spoofing attacks
Without server-side HMAC verification, there's no way to distinguish a genuine event from Stripe from a forged curl request. An attacker can flood a client-side "listener" with fake success payloads, bypass paywalls, or corrupt application state.
Risk 3 — Lost events from ephemeral sessions
A browser tab is transient — users close it, switch networks, or their laptop sleeps. If a customer finishes checkout and closes the tab before your client-side code would have "received" the webhook, that event is gone for good. Webhook handling needs to live on infrastructure with high uptime that can acknowledge the provider immediately with an HTTP 200.
The Correct Architecture: Backend Ingress + Real-Time Push to the Client
To handle webhooks securely and still update your React UI live, you need a two-tier setup: a backend that ingests and verifies the webhook, and a separate real-time channel that notifies the browser.
SECURE WEBHOOK ARCHITECTURE

  +-----------------------+
  |  Webhook Provider     |
  |  (Stripe, GitHub)     |
  +-----------------------+
              |
              | 1. HTTP POST /api/webhook (signed payload)
              v
  +------------------------------------------------------------------+
  |  YOUR BACKEND INGRESS LAYER (Node.js / Express / Next.js route)  |
  |                                                                  |
  |  a. Read the RAW request body                                   |
  |  b. Verify the HMAC signature using your secret key             |
  |  c. Update your database                                        |
  |  d. Return 200 OK immediately                                   |
  +------------------------------------------------------------------+
              |
              | 2. Push an update via WebSocket / SSE / pub-sub
              v
  +------------------------------------------------------------------+
  |  CLIENT BROWSER (React / Vue / SPA)                              |
  |                                                                  |
  |  a. Listens over Server-Sent Events or WebSockets                |
  |  b. Updates React state when notified                            |
  +------------------------------------------------------------------+
Step 1 — A server-side ingress layer
This layer is the public target for the webhook. It can be a Node/Express server, a Next.js App Router route handler, a serverless function (AWS Lambda, Vercel Functions), or a backend-as-a-service function (Supabase Edge Functions).
Here's a Next.js App Router example (app/api/webhook/route.ts):
// app/api/webhook/route.ts
import { headers } from 'next/headers';
import { NextResponse } from 'next/server';
import Stripe from 'stripe';

const stripe = new Stripe(process.env.STRIPE_SECRET_KEY!, {
  apiVersion: '2026-07-29.dahlia', // pin an explicit API version — see note below
});

const endpointSecret = process.env.STRIPE_WEBHOOK_SECRET!;

export async function POST(req: Request) {
  // 1. Read the raw body as text — required for signature verification
  const body = await req.text();
  const headersList = await headers(); // headers() is async since Next.js 15
  const sig = headersList.get('stripe-signature');

  if (!sig) {
    return NextResponse.json(
      { error: 'Missing stripe-signature header' },
      { status: 400 }
    );
  }

  let event: Stripe.Event;

  try {
    // 2. Verify the HMAC signature on the server, never in the browser
    event = stripe.webhooks.constructEvent(body, sig, endpointSecret);
  } catch (err: any) {
    console.error(`Webhook signature verification failed: ${err.message}`);
    return NextResponse.json(
      { error: `Webhook Error: ${err.message}` },
      { status: 400 }
    );
  }

  // 3. Handle the verified event
  switch (event.type) {
    case 'payment_intent.succeeded': {
      const paymentIntent = event.data.object as Stripe.PaymentIntent;
      console.log(`Payment succeeded: ${paymentIntent.id}`);

      await fulfillOrder(paymentIntent);
      await notifyClient(paymentIntent.metadata.customerId);
      break;
    }
    default:
      console.log(`Unhandled event type: ${event.type}`);
  }

  // 4. Acknowledge receipt right away
  return NextResponse.json({ received: true }, { status: 200 });
}
A note on that apiVersion string: Stripe now names its yearly major releases after plants — Acacia, Basil, Clover, and, as of March 2026, Dahlia — with monthly dated sub-releases inside each one (for example 2026-07-29.dahlia). Pin a specific dated version in your code rather than relying on your account's dashboard default, and check Stripe's API versioning docs for whatever the current release is when you deploy, since a new dated version ships roughly monthly.
A newer option: Stripe's "thin" events
Historically, Stripe webhooks shipped the entire resource object in the payload ("snapshot" events) — which meant every time you upgraded your account's API version, your webhook handlers could break. Stripe has been rolling out thin events: compact notifications that tell you what happened and give you an ID, and your server then fetches the full object from the API if it needs the details. This makes handlers version-stable across API upgrades. Thin events are generally available for newer v2-style resources and, as of late 2025, in private preview for v1 resources like PaymentIntent and Charge. If you're starting a new integration today, it's worth checking Stripe's event destinations documentation to see whether thin events already cover the resources you need — it can save you a migration later.
Step 2 — Push the update to React in real time
Once your backend verifies and processes the webhook, you need a way to get that update into the UI. Three common patterns:
- Server-Sent Events (SSE) — lightweight, one-directional, uses the browser's built-in
EventSourceAPI over plain HTTP. Good default for "notify the UI when X happens." - WebSockets / managed realtime (Pusher, Ably, Supabase Realtime) — better when you need bidirectional communication or need to broadcast to many connected clients at once.
- Short polling with React Query / SWR — a pragmatic fallback: the client periodically re-checks a status endpoint until it flips from
pendingtocomplete.
Backend SSE endpoint (Node/Express):
// server.js — SSE notification channel
app.get('/api/events/:userId', (req, res) => {
  res.setHeader('Content-Type', 'text/event-stream');
  res.setHeader('Cache-Control', 'no-cache');
  res.setHeader('Connection', 'keep-alive');

  const userId = req.params.userId;

  const sendNotification = (data) => {
    res.write(`data: ${JSON.stringify(data)}\n\n`);
  };

  eventEmitter.on(`payment_success_${userId}`, sendNotification);

  req.on('close', () => {
    eventEmitter.off(`payment_success_${userId}`, sendNotification);
  });
});
Frontend React hook:
// src/hooks/usePaymentStatus.ts
import { useEffect, useState } from 'react';

export function usePaymentStatus(userId: string) {
  const [status, setStatus] = useState<'pending' | 'success' | 'failed'>('pending');
  const [paymentData, setPaymentData] = useState<any>(null);

  useEffect(() => {
    if (!userId) return;

    // Connect to your own backend SSE endpoint — never a third-party webhook URL directly
    const eventSource = new EventSource(`/api/events/${userId}`);

    eventSource.onmessage = (event) => {
      const data = JSON.parse(event.data);
      if (data.type === 'PAYMENT_COMPLETE') {
        setStatus('success');
        setPaymentData(data.payload);
        eventSource.close();
      }
    };

    eventSource.onerror = (error) => {
      console.error('SSE error:', error);
      eventSource.close();
    };

    return () => eventSource.close();
  }, [userId]);

  return { status, paymentData };
}
A cross-provider option: the Standard Webhooks spec
If you're building your own outbound webhooks, or consuming webhooks from a growing list of providers, it's worth knowing about Standard Webhooks — an open specification for signing and sending webhooks consistently, backed by the webhook infrastructure company Svix along with a steering group that includes Zapier, Twilio, ngrok, and Supabase. Several AI providers, including OpenAI, Anthropic, and Google Gemini, send their webhooks in this format.
A Standard Webhooks request carries three headers:
webhook-id: msg_2eaf7c9b10
webhook-timestamp: 1753193011
webhook-signature: v1,g0hM9SsE9BqjT8pReExtn4hQoK7oX0dY9lNv2xY6r1o=
The signature is an HMAC-SHA256 hash of {webhook-id}.{webhook-timestamp}.{raw body}, and the v1, prefix lets the scheme version itself and support multiple valid signatures during a secret rotation. Rather than hand-rolling this, use the standardwebhooks (or provider-specific svix) library:
const { Webhook } = require('standardwebhooks');

const wh = new Webhook(process.env.WEBHOOK_SECRET); // whsec_...
const payload = wh.verify(rawBody, {
  'webhook-id': req.headers['webhook-id'],
  'webhook-timestamp': req.headers['webhook-timestamp'],
  'webhook-signature': req.headers['webhook-signature'],
});
This still runs on your backend ingress layer, not in the browser — it's a drop-in replacement for the manual HMAC check, not a way around the architecture above.
Testing Webhooks During Local Development
Locally, your ingress route runs on http://localhost:3000. Providers like Stripe or GitHub can't send a POST to localhost, since it isn't reachable from the public internet. You need a tunnel.
Option 1 — The Stripe CLI (best for Stripe)
# Install and authenticate
brew install stripe/stripe-cli/stripe
stripe login

# Forward live events to your local route
stripe listen --forward-to localhost:3000/api/webhook
The CLI prints a local webhook signing secret (whsec_...) — drop that into your .env.local so signature verification works locally too. Under the hood, the CLI opens a direct connection to Stripe rather than routing through a public tunnel, which is why it doesn't need a registered endpoint in test mode.
Option 2 — Cloudflare Tunnel or ngrok (for anything else)
For GitHub, Shopify, Twilio, Clerk, and most other providers, expose your local server through a public HTTPS tunnel:
# Cloudflare Tunnel (free)
cloudflared tunnel --url http://localhost:3000

# or ngrok
ngrok http 3000
Either tool gives you a public HTTPS URL (e.g. https://random-subdomain.trycloudflare.com) that forwards to http://localhost:3000. Paste https://random-subdomain.trycloudflare.com/api/webhook into the provider's webhook dashboard, and payloads will tunnel straight to your dev server.
Architecture Checklist
| Layer | Responsibility | Where it runs |
|---|---|---|
| Frontend React app | Renders the UI, kicks off checkout, listens for updates via SSE/WebSockets | Client browser |
| Backend ingress API | Receives the webhook POST, verifies the signature, updates the database, returns 200 OK | Node.js, Next.js route handlers, serverless functions |
| Database | Source of truth for payment/subscription state | PostgreSQL, MongoDB, Redis, Supabase |
| Tunneling tool | Bridges public webhooks to localhost during development | Stripe CLI, Cloudflare Tunnel, ngrok |
Production Readiness Checklist
Before shipping a webhook integration, confirm:
- Raw body parsing — your route reads the raw request body (
req.text(), orraw-bodymiddleware) before any JSON parsing, since the HMAC signature is computed over the exact bytes sent. - Secret isolation — webhook secrets live only in server-side environment variables and are never bundled into client-side JavaScript.
- Fast responses — your endpoint returns
200 OKwithin a few seconds. Heavy work (PDFs, emails, downstream API calls) gets queued and processed asynchronously instead of blocking the response. - Idempotency — you check the event's ID before processing, so a provider's automatic retries (which happen if you're slow to respond, or don't respond at all) don't double-charge or double-fulfill.
- A pinned API version — for Stripe specifically, pin a dated
apiVersionin code rather than depending on your dashboard's default, so an account-level upgrade can't silently change your webhook payload shape.
The Bottom Line
Moving webhook ingestion off the client browser and onto a proper backend layer isn't a workaround — it's the only architecture that actually works, because browsers are deliberately built to refuse inbound connections and to block cross-origin responses that lack the right headers. Once the backend verifies and stores the event, pushing a lightweight real-time update to React over SSE or WebSockets gives you the same "instant UI" experience developers are usually chasing when they first try to catch a webhook directly — without exposing a signing secret to anyone who opens DevTools.